¶ Rooms
¶ Overview
Rooms are how you can organize where your events take place. Note that there is no requirement that a room be an actual physical room and it may be helpful to subdivide large Rooms into smaller Rooms. Rooms can be further devided into spaces (e.g. tables) if an event will be assigned to a part of the room at a specified date/time.
For each room you can control a large number of options including:
- Who can schedule events in the room
- If it contains spaces and how they are handled
- If it allows lobbies and if any of them are applied to events automatically
- If it has specific phased release criteria
- What type of events can be submitted and how they are reviewed and scheduled
- When the room is available
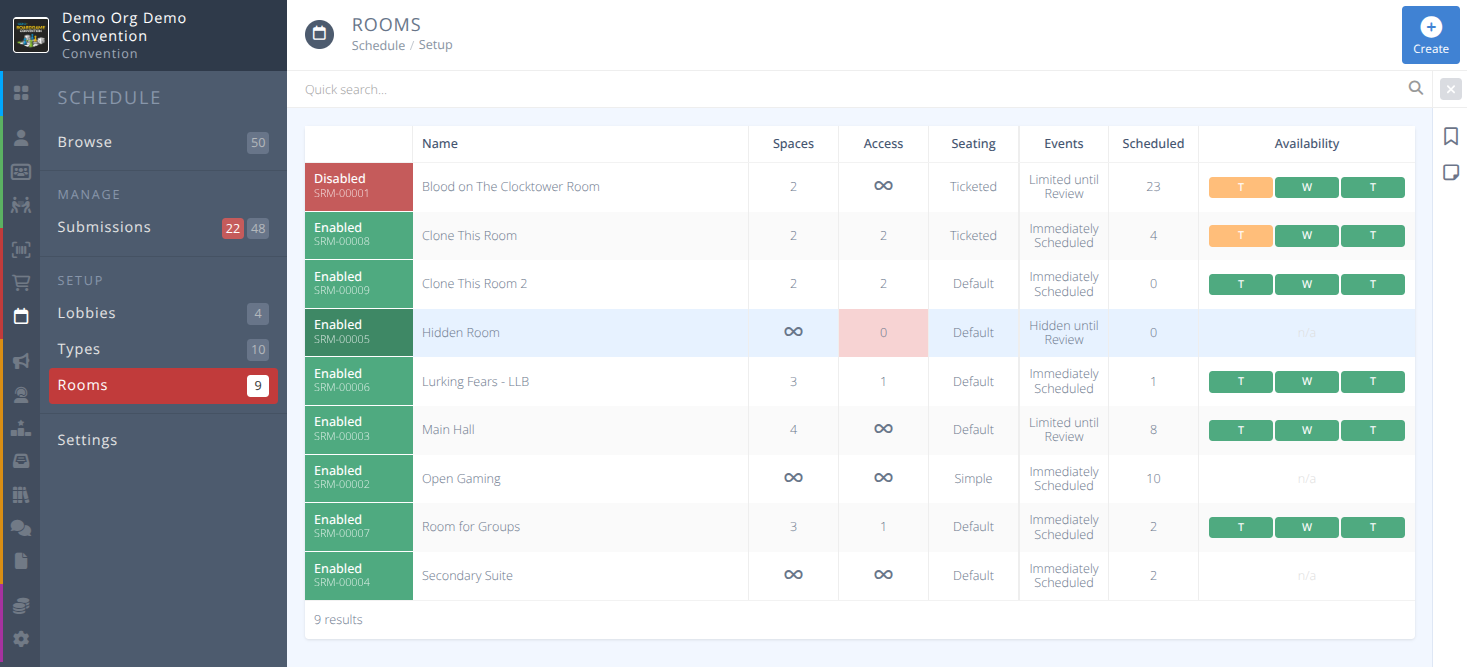
As with all grids in the system rooms may be filtered using the Quick search.... Click the button to reset any applied filter.
¶ Common Procedures
Create a RoomManage Phased Releases for a RoomManage Default Lobbies for a RoomManage Spaces in a Room
¶ Fields
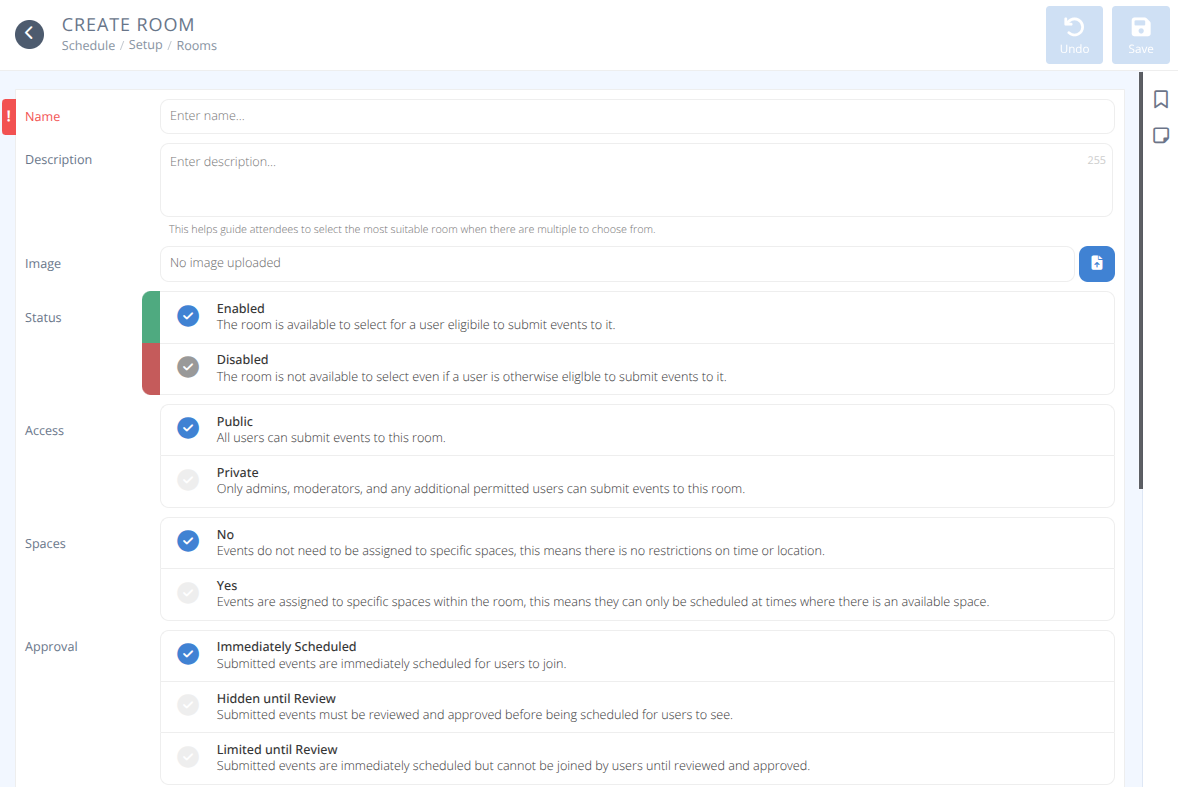

Name - The name for your room.
Description- A short description to help guide attendees to select the most suitable room when there are multiple to choose from.Image- An image of the room to help attendees submitting events select the most suitable room.Status- The status of the room, either:
Enabled - The room is available to select for a user eligible to submit events to it.
Disabled - The room is not available to select even if a user is otherwise eligible to submit events to it.Access- Who can submit events to the room, either:
Public - All users can submit events to this room.
Private - Only admins, moderators, and any additional permitted users can submit events to this room.Spaces- Are events assigned to this room assigned to spaces, either:
No - Events do not need to be assigned to specific spaces, this means there are no restrictions on time or location
Yes - Events are assigned to specific spaces within the room, this means they can only be scheduled at times where there is an available space.Approval- How are events submitted by attendees handled, either:
Immediately Scheduled - Submitted events are immediately scheduled for users to join.
Hidden until Review - Submitted events must be reviewed and approved before being scheduled for users to see.
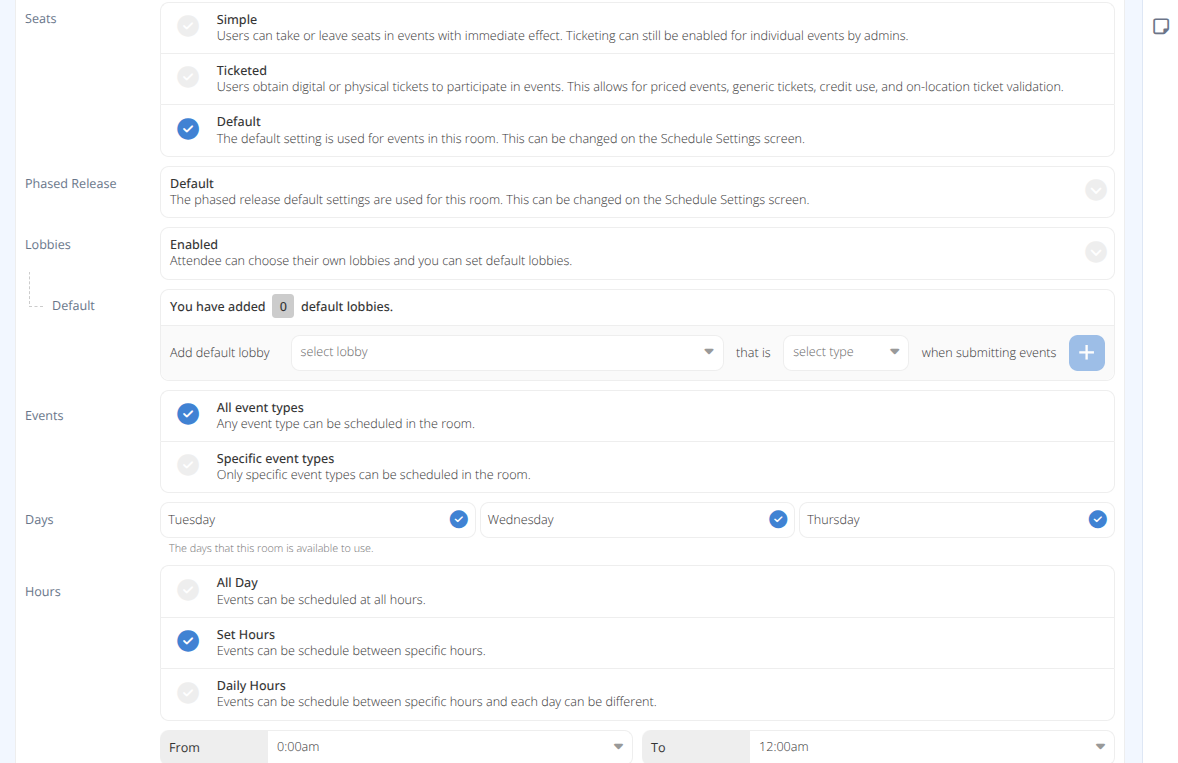
Limited until Review - Submitted events are immediately scheduled, but cannot be joined by users until reviewed and approved.Seats- How are spots handled for this event, either:
Simple - Users can take or leave seats in events with immediate effect. Ticketing can still be enabled for individual events by admins.
Ticketed - Users obtain digital or physical tickets to participate in events. This allows for priced events, generic tickets, credit use, and on-location ticket validation.
Default - The default setting is used for events in this room. This can be changed on the Schedule Settings screen.Phased Release- How are seats released to attendees, either:
Default - The phased release default settings are used for this room. This can be changed on the Schedule Settings screen.
Enabled - All seats start as unavailable until released over one or more phases to some or all attendees. This can be overwritten by individual events.
Disabled - All seats are available immediately to all attendees. This can be overrideen by individual events.
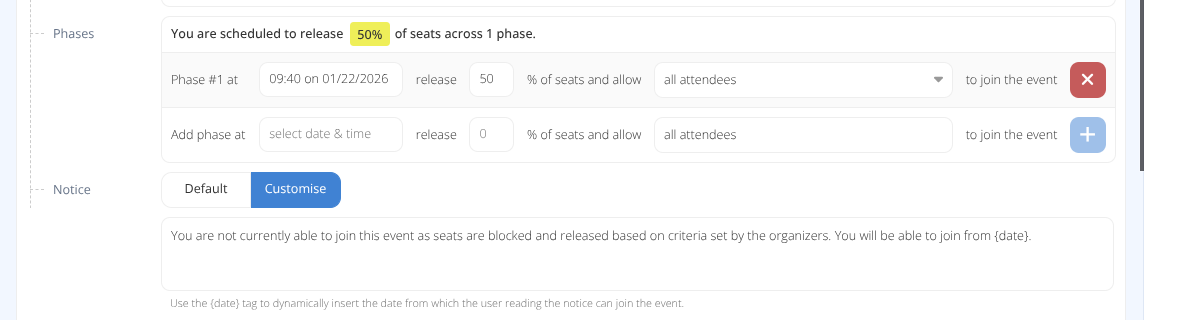
Phases- A list of phases that specify at a selecteddate & timerelease a%of seats and allowselected attendeesto join events.Notice- The message displayed to attendees when seats are currently blocked, either:
Default - Use the message defined in the Settings.
Customise - Specify a custom message for this room.
Lobbies- How to handle Lobbies on events in this room, either:
Disabled - Attendees cannot choose their own lobbies, but you can still set default lobbies.
Enabled - Attendees can choose their own lobbies and you can set default lobbies.Default- A list of lobbies that will be added to all events in this room. Note: These will count towards the lobby limit as set in Settings.
Events- Which events can be scheduled in this room, either:
All event types - Any event type can be scheduled in the room.
Specific event types - Only the specified event types can be scheduled in the room. Admins may always override this when creating or editing events from the admin side.
Days- A list of days during the convention when this room will be available for events.Hours- The hours this room is available for scheduling, either:
All Day - Events can be scheduled at all hours.
Set Hours - Events can be scheduled between the specified hours on all days. One set ofFromandTotimes will be set for all days.
Daily Hours - Events can be scheduled between specific hours and each day can be different. Each day will be shown with aFromandTotime.
Spaces- A button to manage the spaces (e.g. tables) that can have events scheduled to them. This is only available if Spaces is set to Yes
¶ Procedures
¶ Create a Room
- From the menu of the section click .
- Specify the Name and other values using the Fields section for information on each field.
- If
Phased Releaseis set to Enabled refer to theManage Phased Release for a Roomprocedure. - If
Lobbiesis set to Enabled refer to theManage Default Lobbies for a Roomprocedure. - Click
¶ Manage Phased Releases for a Room
- From the Schedule menu select the Rooms sub-menu.
- Locate the room you wish to manage Phased Release for using the Quick search... or filter options as needed and click on the row.
- Locate the Phased Release section of the Room and choose your action below
- Locate the
Phasessection. Note that you will be shown the current % of seats that have already been scheduled for release. - In the Add phase at row
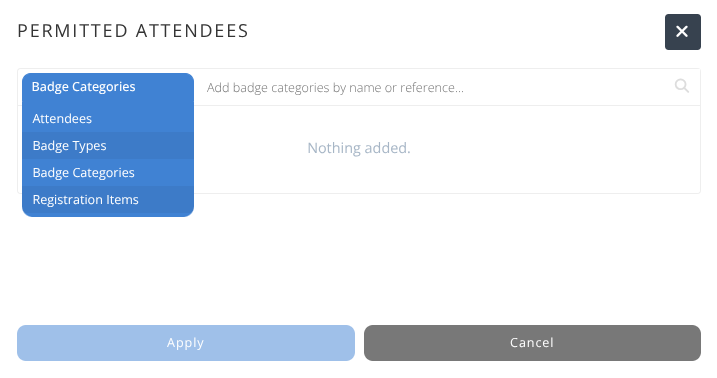
select your date & time, enter the%of seats to release and specify theattendeesto allow to join the event. - If you choose Select additional permitted attendees a side panel will be shown where the attendees allowed may be specified.
You may specify the criteria in this panel to allow access. Access can be granted to any of the following:
Attendees - The specified attendees will have access.
Badge Types - Attendees holding the specified badge types will have access.
Badge Categories - Badge Holders assigned the specified Categories will have access.
Registration Items - Attendees who have the specified items will have access.
Refer to the Specify Attendees tab above for this portion. - Click the to add the Phase.
- Repeat as needed. When the phases are as desired click
- Select the required criteria to allow someone access using the dropbox.
- Start typing the specific details of the criteria you want to apply. e.g.) Big
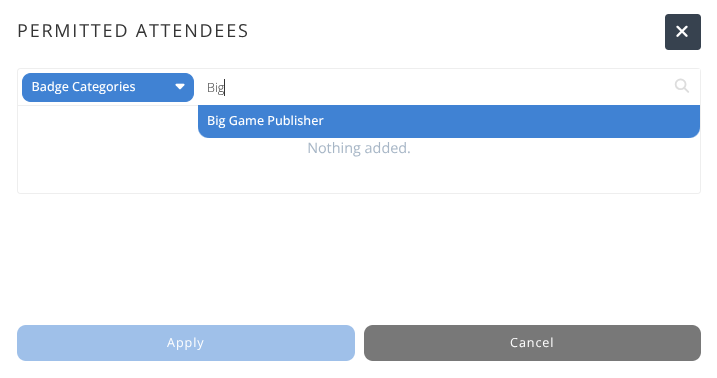
- Select from the displayed options the specific criteria you want to apply and it will be added to the grid and display the number of attendees it applies to.
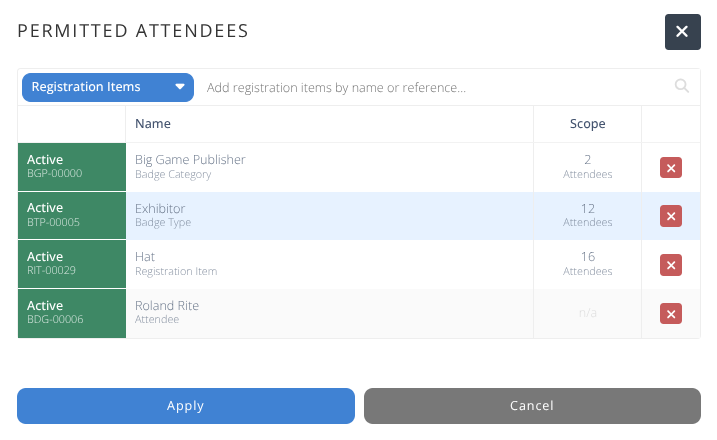
- To remove a criteria click the
- Repeat as needed. When you the criteria are as desired click .
- Locate the Phase you want to modify.
- Adjust the
date & timeor%as needed. - To adjust the attendees the phase applies to click on the dropbox and select Change permitted attendees
- A side panel will be shown where the current attendees this phase applies to are shown.
Refer to the Specify Attendees tab above for this portion. - Repeat as needed. When the phases are as desired click
- Locate the Phase you want to remove.
- Click the to remove the Phase.
- Repeat as needed. When the phases are as desired click .
- Select .
- Specify the message you wish attendees to see when seats are not yet released to them specifically. You may use the {date} tag to dynamically insert the date from which the specific user will gain access based on the Phased Release criteria.
- Click .
¶ Manage Default Lobbies for a Room
¶ Manage Spaces in a Room
¶ Previous Documentation
-Spaces Bar (When selecting Yes For Space ONLY): A Spaces Bar to setup and define your spaces will appear after saving. See below for more information about the Spaces Bar.
Spaces
Manage the spaces that can be booked in the room.
-
Click the Spaces bar.
-
Click Create at the top of the page.
-
Specify the following parameters:
a. Name: Enter the name of the Space in the room (e.g. Table #1, Publisher Name Table, etc.).
b. Seats: Enter the total number of seats that are allowed in that space.
c. Status: Same as described above.
d. Access: Select All Eligible to allow this specific space's access to all people permitted to use the room. Select Admin * Moderators to restrict this specific space's access to admins and mods only. Click Allowlist restrict this specific space's access to admins, mods and other permitted users.
e. Days: Same as described above.
f. Hours: Same as described above. -
Click Save.
Repeat this process for each space you want to create in this specific room.
Wizard
Create multiple spaces that can be booked in the room at once.
a. Name Template: Enter the naming format you want to use. Enter the name of the event with either {number} or {letter} after to automatically number or letter the spaces (e.g. Table {number} = Table 1, Table 2, etc. & Table {letter} = Table A, Table B, etc.)
b. Number of Spaces: Enter the number of spaces you want the Wizard to create.
c. Seats Per Space: Enter the number of seats you want the Wizard to create per space.
Clone
From each specific room page, you can clone a room to replicate all of the setup into a separate room. Click Clone. Enter the new name for the new room. Click Save.