¶ Lobbies
¶ Overiew
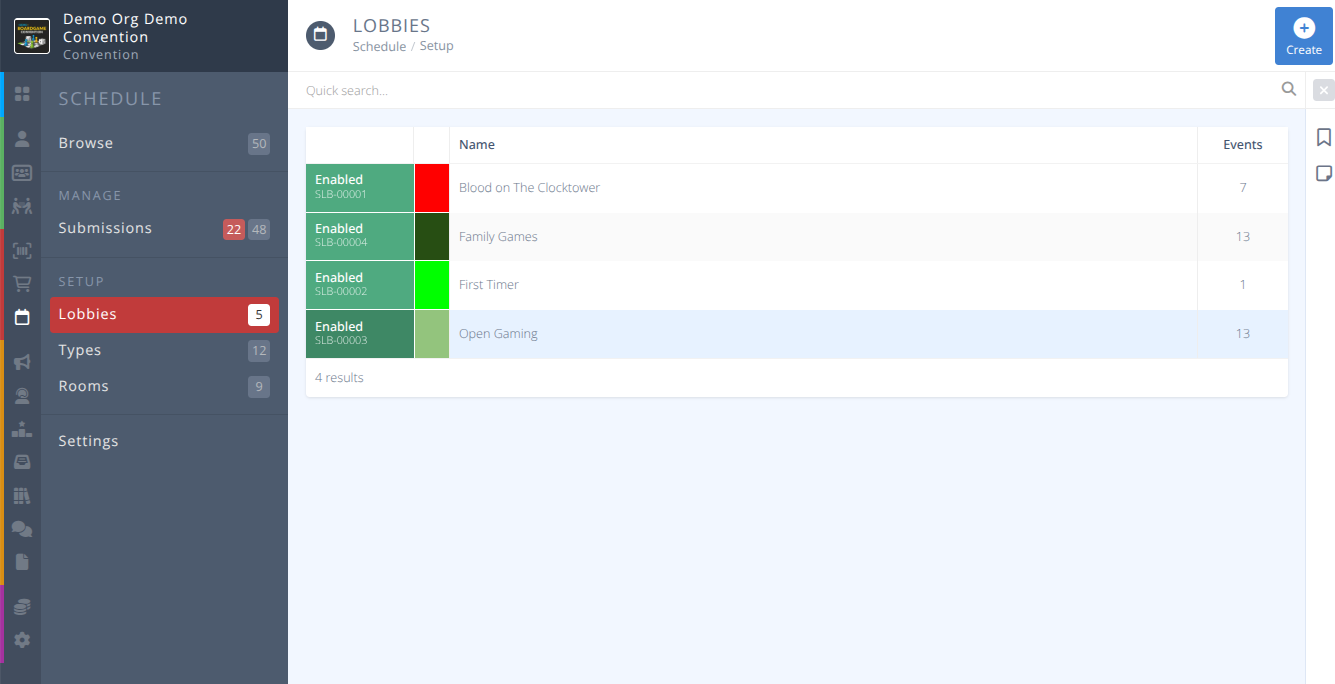
Lobbies are a way of gathering people together around topics. They have their own unique chat and events may be tagged with them to quickly allow attendees to find events that are related. Lobby tags may also be used to filter events in the Schedule. You can control who can use lobbies and even provide default lobbies for rooms.
¶ Common Procedures
¶ Fields

Name - The name of the lobby.
Status- The status of the lobby, one of:
Enabled - The lobby is available to view and submit events to.
Disabled - The lobby is not available to view or submit events to.-
Description - A brief description of the lobby to help attendees understand what it is for. -
Image - An image to display in the lobby menu that helps identify the lobby. -
Color - The color of the lobby tag. -
Usage- Who can use the lobby, one of:
Open - This lobby can be tagged by anyone creating an event.
Private - This lobby can only be tagged by moderators and administrators creating an event.
Closed - This lobby can only be tagged by administrators creating an event in the manage interface. From- If selected, the date and time when events can start to be tagged with this lobby.Until- If selected, the date and time when events can no longer tag with this lobby.
¶ Procedures
¶ Create a Lobby
- From the menu of the section click
- Proceed through the tabs to enter the details of your lobby.

a) Enter the Name of your Lobby.
b) Select the Status of your Lobby.
c) Click on the Appearance tab.
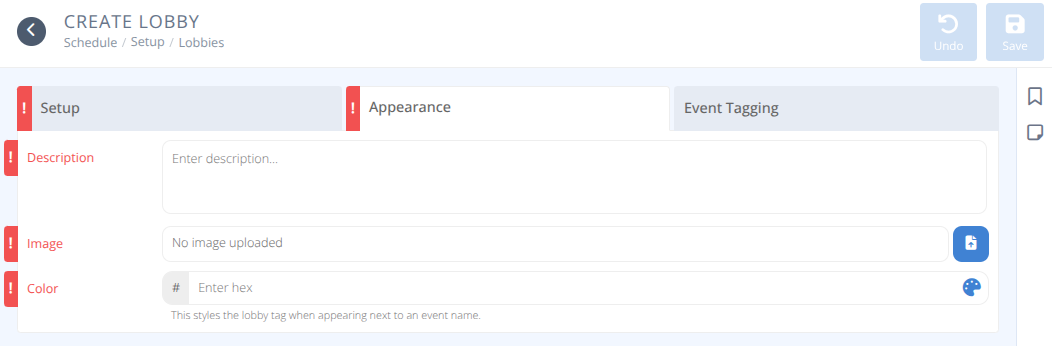
a) Enter a brief Description for your Lobby to help attendees understand its usage.
b) Click the button to upload an Image to be displayed on the attendee view of the lobby.
c) Either enter the hex value or click the Pallette to select a color for the lobby tags.
d) If desired click on the Event Tagging tab.
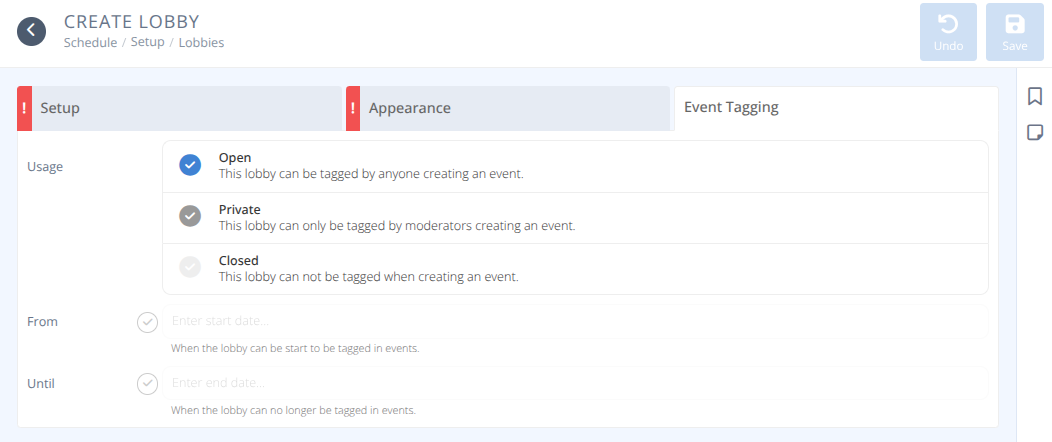
a) Select what Usage is allowed for this Lobby.
b) If desired select the From checkbox and select a date and time for this Lobby to be available for tagging.
c) If desired select the Until checkbox and select a date and time after which the Lobby may no longer be used to tag events.
- Click
Repeat this process for each lobby that you want to create. There is no limit on how many lobbies your convention can have.
¶ Modify a Lobby
-
From the menu of the section select the row of the Lobby you wish to modify, using the quick search to narrow your search if needed.
-
Click on the row of the Lobby you wish to modify.
-
Modify the fields as needed using the
Fieldssection as a reference as needed. -
Click
¶ Delete a Lobby
-
From the menu of the section select the row of the Lobby you wish to modify, using the quick search to narrow the results if needed.
-
Click on the row of the Lobby you wish to delete.
-
Confirm that there are no events using this lobby by referencing the Events count.
-
Click
Warning: Deleting a Lobby cannot be reversed. Any events using this Lobby will lose the associated tag.
- Click